Setting up Apollo SSO with Okta
⚠️ Single sign-on (SSO) is available only for Enterprise plans. Unlike most Enterprise features, this feature is not available as part of an Enterprise trial.
This guide walks through configuring Okta as your Apollo organization's identity provider (IdP) for single sign-on (SSO). These steps require an Okta account with administrator privileges.
1. Create an app integration
-
From your Okta Administrator Dashboard, navigate to the Applications view.
-
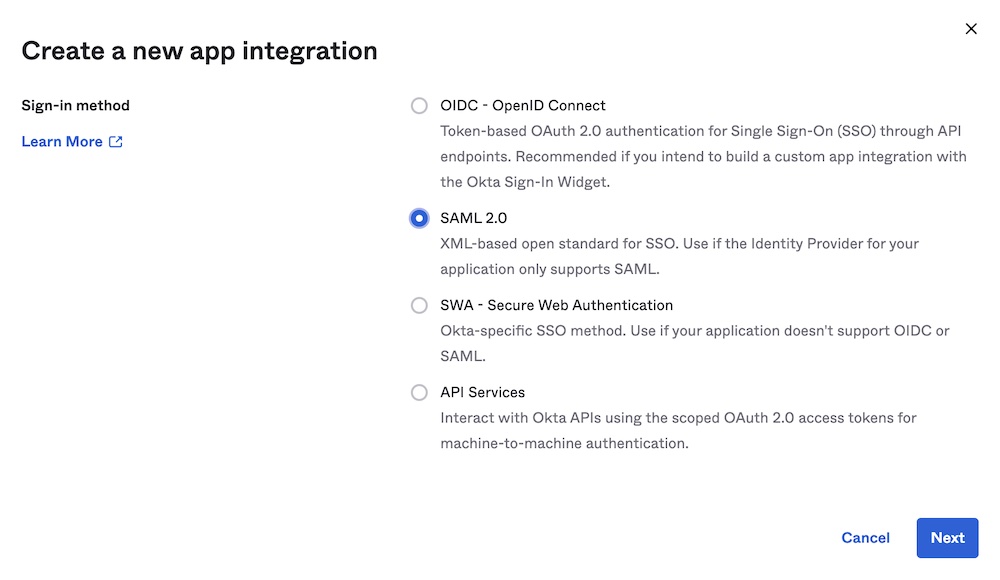
Click Create App Integration. The following dialog appears:
-
Select SAML 2.0 as your sign-in method.
-
Click Next. The Create SAML Integration dialog appears.
2. Create a new SAML integration
The Create SAML Integration dialog includes multiple steps:
-
In the General Settings step, provide the following values:
- App name:
Apollo GraphOS - App logo: Apollo logo (optional)
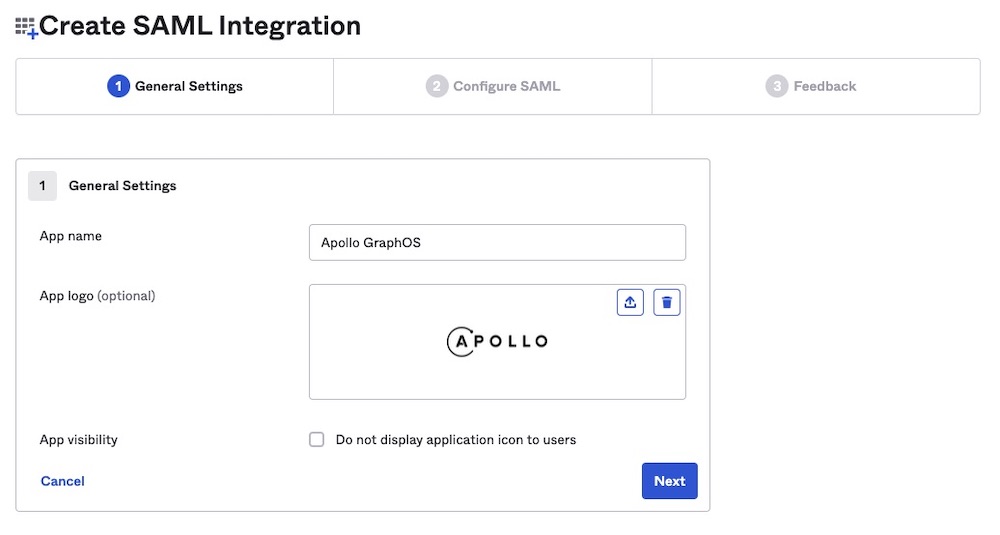
Then click Next.
- App name:
-
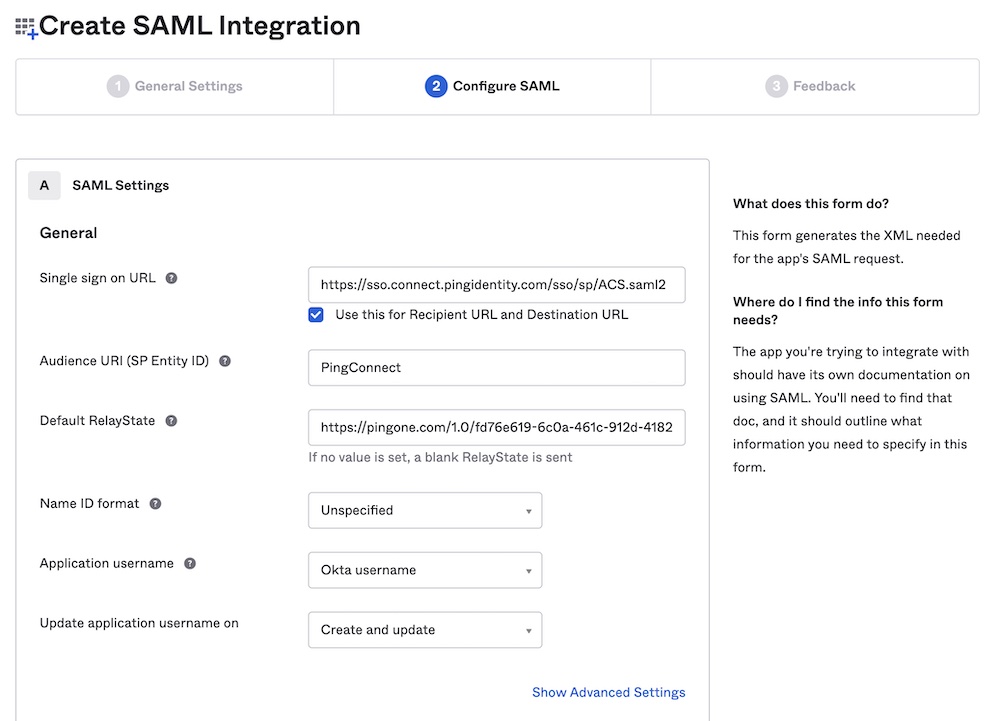
In the Configure SAML step, provide the following values:
-
Single sign on URL:
https://sso.connect.pingidentity.com/sso/sp/ACS.saml2- Also check Use this for Recipient URL and Destination URL.
-
Audience URI (SP Entity ID):
PingConnect⚠️ If
PingConnectalready exists, usefd76e619-6c0a-461c-912d-418278929d60 -
Default RelayState:
https://pingone.com/1.0/fd76e619-6c0a-461c-912d-418278929d60
-
-
Still in the Configure SAML step, scroll down to Attribute Statements. Set values for the following attributes:
- sub:
user.email- The sub attribute should uniquely identify any particular user to GraphOS. In most cases,
user.emailprovides this unique mapping.
- The sub attribute should uniquely identify any particular user to GraphOS. In most cases,
- email:
user.email - given_name:
user.firstName - family_name:
user.lastName
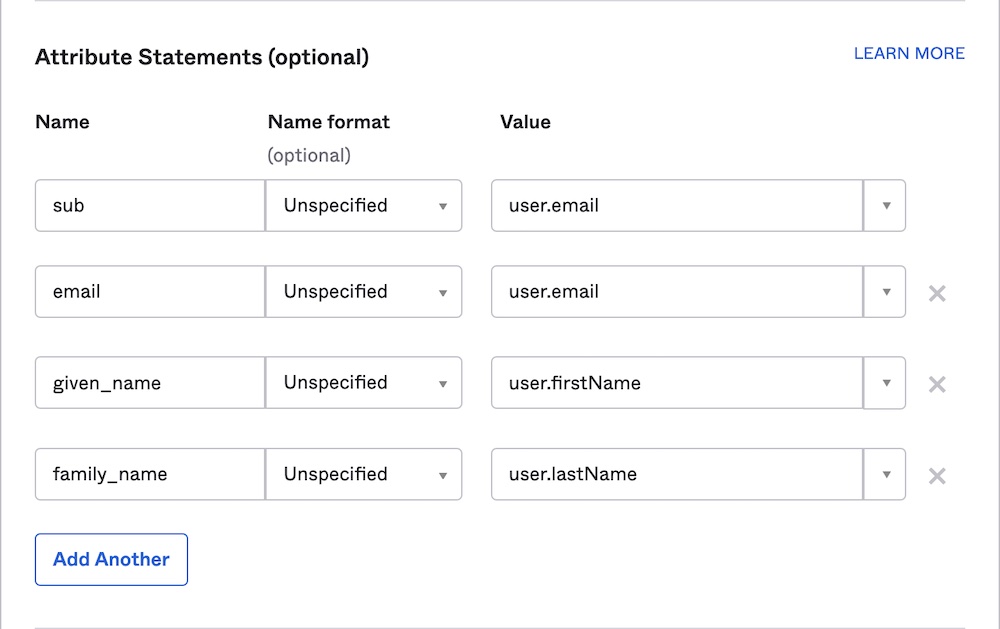
Then click Next.
- sub:
-
In the Feedback step, provide the following values:
- Select I'm an Okta customer adding an internal app.
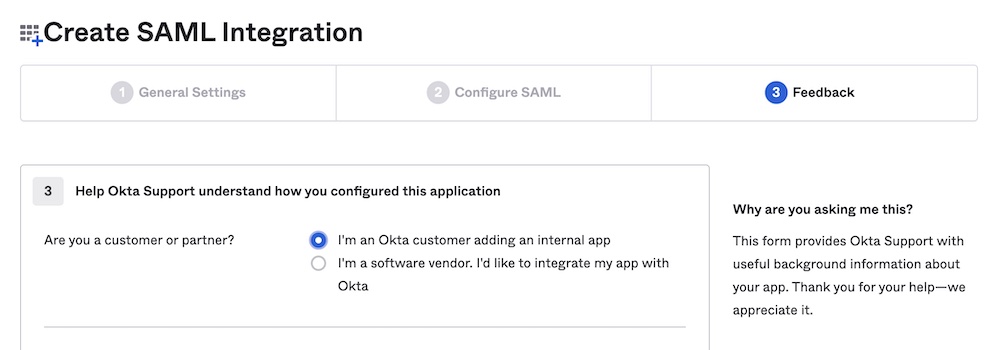
Then click Finish.
3. Send SAML metadata to Apollo
-
From your new SAML integration's details page, scroll down and click View SAML setup instructions on the right side:
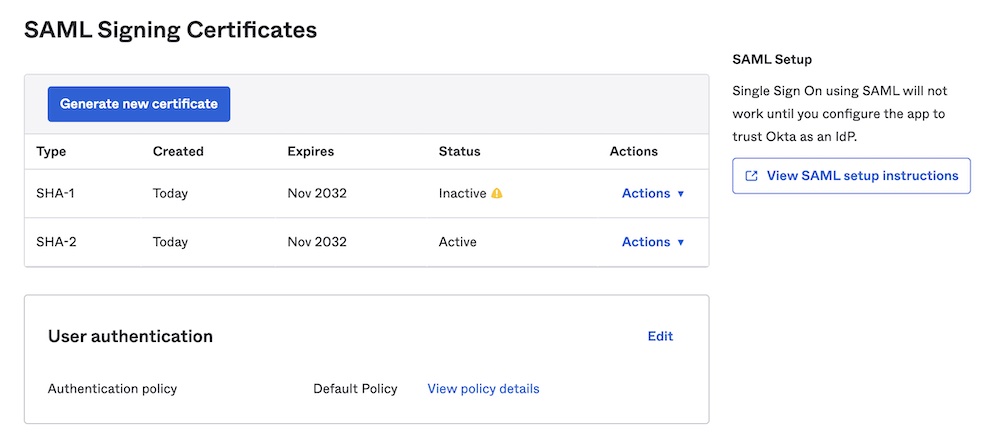
-
In the dialog that appears, copy and paste the contents of the IDP metadata textbox into a text file:

-
Send the text file to your Apollo contact. They will complete your SSO setup.